


A common customer service workflow is to handle customer feedback submitted through a form on your website. In Signavio Process Governance, public form triggers start new cases of a process using an embedded form. This tutorial shows developers how to do this directly over HTTP, using the workflow API from JavaScript, so you can use your own custom form instead of Process Governance’s default look and feel.
Customer feedback forms
When you want to let your customers send feedback via your web site, you’ll probably end up with a feedback form. A form lets you separate complaints from questions, for example, and ask for an email address to reply to.
Feedback forms let you improve on feedback via email because you can add structured data to help you prioritize and route feedback. Handling feedback is itself a business process, so it’s natural to turn to workflow automation for this kind of form:
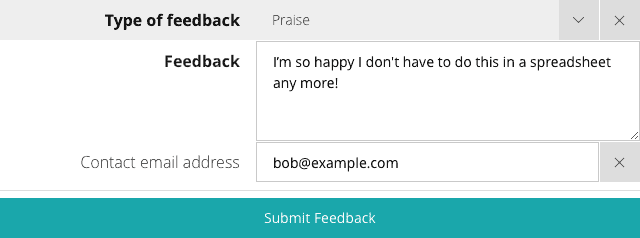
In Signavio Process Governance, you can define a public form that your customers can use to start a workflow for a customer feedback process. These public forms are designed to be embedded on other websites, and do not require your customers to be logged in to Process Governance. This makes it possible to add a form that triggers a feedback workflow with just HTML.
Public forms use Process Governance’s look and feel, by default, including field validation and custom rules for dynamic fields. Alternatively, you can integrate the form with the look and feel of your own website or mobile app by designing a custom form and using the underlying HTTP workflow API to submit the form.
HTTP workflow API
The API for submitting a Process Governance public form uses JSON data sent in an HTTP POST request. The JSON data holds an ‘instance’ of the trigger form.
The HTTP request includes the IDs for the process (the ‘sourceWorkflowId’) and each of the form fields. To discover these IDs, submit the default public form in a web browser, and use a network inspector to view the HTTP request body for the ‘POST /api/v1/public/cases’ request.
If you inspect the HTTP request, you’ll see that it includes each form field’s type and configuration information. Most of these fields are unnecessary: the HTTP request only needs to include each field’s ID and value, as shown in the following literal HTTP request (most HTTP headers omitted for brevity).
POST /api/v1/public/cases HTTP/1.1

Content-Type: application/json
Host: workflow.signavio.com

{
  "triggerInstance": {
    "data": {
      "formInstance": {
        "value": {
          "fields": [
            {
              "id": "16rsah4otbmk000000",
              "value": "Praise"
            },
            {
              "id": "16rscwnlqfrz000000",
              "value": "I’m so happy!"
            },
            {
              "id": "16rsd7xwzvxg000000",
              "value": "bob@example.com"
            }
          ]
        }
      }
    },
    "sourceWorkflowId": "1ac791d862f8a02e51000000"
  }
}
The HTTP response includes the newly-created case’s ID and name (most HTTP headers omitted):
HTTP/1.1 200 OK
Content-Type: application/json;charset=UTF-8

{
  "id": "1ac79962d1dfff2e36000000",
  "name": "Feedback #6 - Praise"
}
Now that you know what the HTTP request should look like, the next step is to add JavaScript to your HTML form that serialises the data in the correct JSON structure, and sends the HTTP request to the workflow API.
Using JavaScript to submit a public data from a custom form
There’s more than one way to build a custom form that uses the HTTP workflow API. For this example, you’ll keep it simple and use:
- An HTML form that the customer will use to enter feedback
- A JavaScript event handler for the form’s ‘onsubmit’ event
- A JavaScript object that serialises to the correct JSON using ‘JSON.stringify’
- A JavaScript Fetch API request to submit the form
The following example code aims for simplicity and no external dependencies, but does not support older web browsers and doesn’t implement a proper user experience. In practice, you would probably modify this to take advantage of your favourite JavaScript libraries.
A minimal plain HTML document containing the form might look something like this:
<!DOCTYPE HTML>
<html lang="en">
<head>
  <meta charset="utf-8">
  <title>Custom form</title>
  <script type="text/javascript" src="sendForm.js"></script>
</head>
<body>
  <form action="https://workflow.signavio.com/api/v1/public/cases">
    <p>
      <label for="type">Type of feedback</label>
      <select id="type" name="type">
        <option>Praise</option>
        <option>Question</option>
        <option>Complaint</option>
      </select>
    </p>
    <p>
      <label for="feedback">Feedback</label>
      <textarea id="feedback" name="feedback" rows="8" cols="40"></textarea>
    </p>
    <p>
      <label for="id">E-mail address</label>
      <input type="email" id="email" name="email">
    </p>
    <p><button type="submit">Send Feedback</button></p>
  </form>
</body>
</html>
The script tag refers to the following JavaScript (ES2016), which uses the fetch API to send the HTTP request:
// Sends the form data to the workflow’s public form trigger.
const sendForm = (event) => {
  event.preventDefault()
  const triggerData = {
    triggerInstance: {
      sourceWorkflowId: '1ac791d862f8a02e51000000',
      data: {
        formInstance: {
          value: {
            fields: [
              {
                "id": "16rsah4otbmk000000",
                "value": document.querySelector('#type').value
              },
              {
                "id": "16rscwnlqfrz000000",
                "value": document.querySelector('#feedback').value
              },
              {
                "id": "16rsd7xwzvxg000000",
                "value": document.querySelector('#email').value
              }
            ]
          }
        }
      }
    }
  }
  const requestOptions = {
    mode: 'no-cors',
    method: 'POST',
    body: JSON.stringify(triggerData),
    headers: new Headers({
      'Content-Type': 'application/json'
    })
  }
  var currentTime = new Date().getTime();
  fetch(document.querySelector('form').action, requestOptions)
    .then(response => console.log('Form submitted'))
    .catch(error => console.error(error))
}

// When the DOM has loaded, attach the 'sendForm' function to the form.
document.addEventListener('DOMContentLoaded', () => {
  document.querySelector("form").addEventListener('submit', sendForm)
})
Now you can click the form’s submit button to start a new case. Check the JavaScript console for the ‘Form submitted’ message, to check that there were no errors.
Conclusion
Triggering a workflow from a custom public form gives you a new alternative to using an email trigger. The advantage of a public form is its ability to collect structured data, at the cost of a more complex interface.
This public form trigger API is a great example of Signavio Process Governance’s power. Process Governance combines collaborative web-based task management with ways to integrate with your existing systems. This combination lets you start with a low-cost workflow automation pilot project, and add integration for processes whose business case justifies it.
To use Signavio Process Governance to automate your customer feedback forms, as well as your back-office business processes, register for a free 30-day trial today.